
2007 FESTIVAL OF FRUIT PRESENTATION:
A FEW THINGS YOU SHOULD KNOW ABOUT FIGS
California Rare Fruit Growers Fruit Gardener November-December 2007
1
Introduction


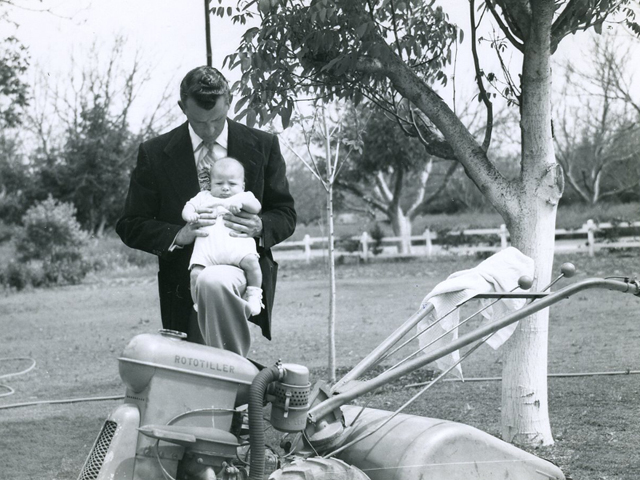
I guess the 2007 Festival of Fruit planning committee decided to book me as an expert presenter for two reasons: I have more fig trees than most people, plus I was willing to talk very cheap. Briefly, I have been gardening since I was in diapers. I joined CRFG nearly 20 years ago, and have been growing figs for more than 20 years.
Because I operate an online nursery, Encanto Farms Nursery, I was able to make many fig varieties available at the Festival plant sale, along with a number of the 100 banana varieties that I grow.
Understand, however, that I am a hobbyist like you. I am not a biologist, not a botanist and I have no formal education or background in botany or agriculture. So when it comes to growing things, I am not doing anything that you wouldn’t be able to do. I keep experimenting, and I hope that I can shorten your learning curve by sharing what I have experienced. Along the way I have benefited greatly from the experience of CRFG’s Richard Watts, and many collectors I’ve met on the GardenWeb Fig Forum.
I grow about 300 varieties of figs and, although each has its own set of characteristics, the similarities far outweigh the differences.
My goal here, as it has been classically expressed, is not to give you a fish...
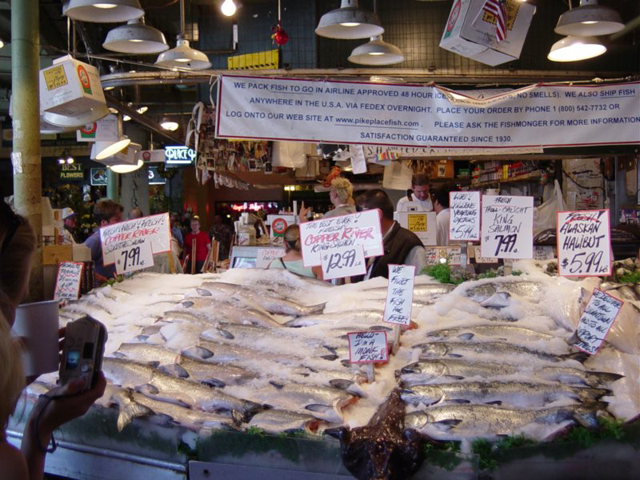
...but to teach you to power fish. I hope to introduce you to the basics of figs, to help you understand the principles underlying successful fig cultivation and to make you aware of information resources available so you can successfully grow any fig.

So I’m not going to devote much space here to biological detail, except where it is important to successful growing of figs. Each variety has many similarities as well as differences, so before we get to the end there will be several reminders urging you to become familiar with your variety, its specific characteristics and its habits.
I am biased. I do not grow organically. This doesn’t mean I’m opposed to that philosophy and form of plant care, only that I am not qualified to address fig cultivation in terms of organic gardening. So if you grow organically, you will have to adapt my remarks to your situation.
NOTE: If you have a tree that is a poor grower, try really over fertilizing it for a year and see if it doesn't break out the following year.
2
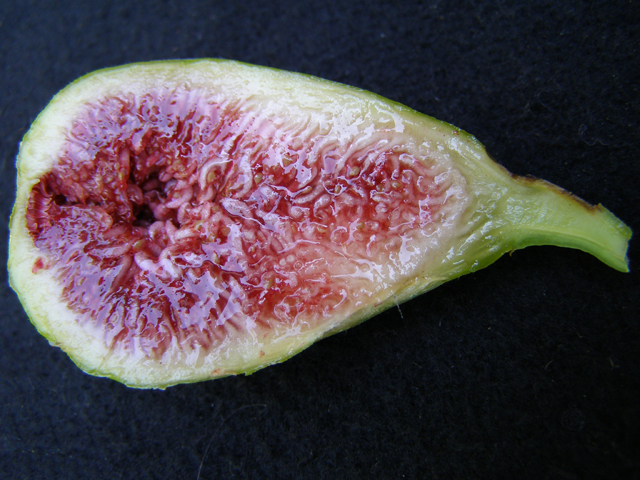
Lets begin with taste
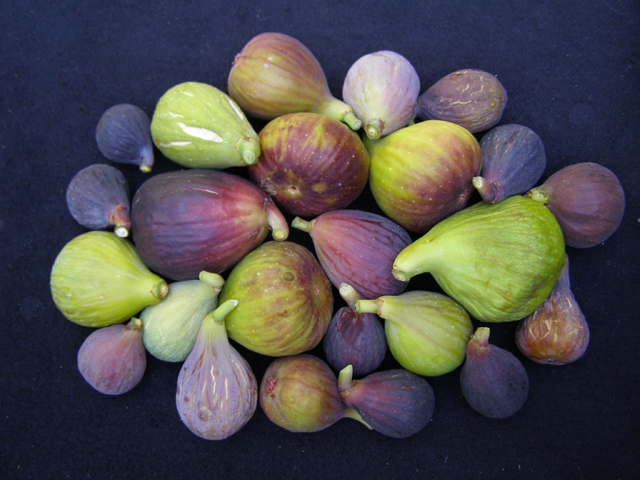
This is an opportunity for me to test a personal theory. Although I can’t see your responses, consider these questions: How many people like dark colored figs?
How many people like light colored figs?
How many people like every fig?
How many people love Brown Turkey Figs?
How many people hate Brown Turkey Figs?
I bet your answers will vary widely. The point is that taste can vary considerably from one individual to another. So when you ask someone what is a good tasting fig, make sure you are asking someone who shares your taste profile.
For example, if you like Brown Turkey figs, you will want to consider these named varieties: Blue Giant, Black Spanish, Black Jack or Walker. If you don’t care for Brown Turkeys, chances are you wouldn’t like any of the above varieties either.
NOTE: Do not judge a fig's taste by the fruit you get in the first couple years. It may not be as good as you expected, but often it will improve significantly with a little age. Many aspects of figs and fig trees change after a couple years of juvenility and increasing maturity.
3
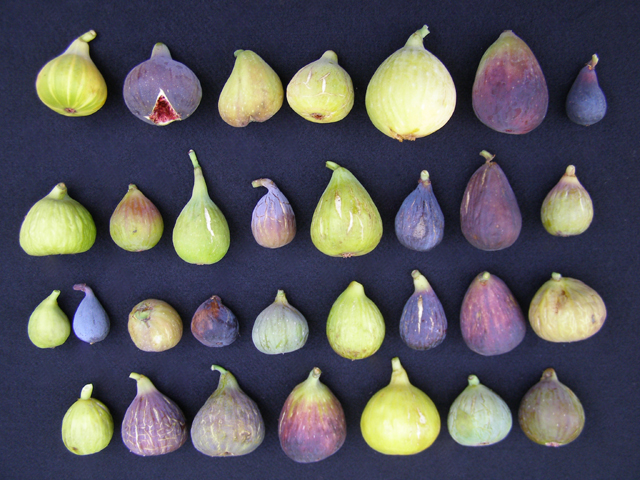
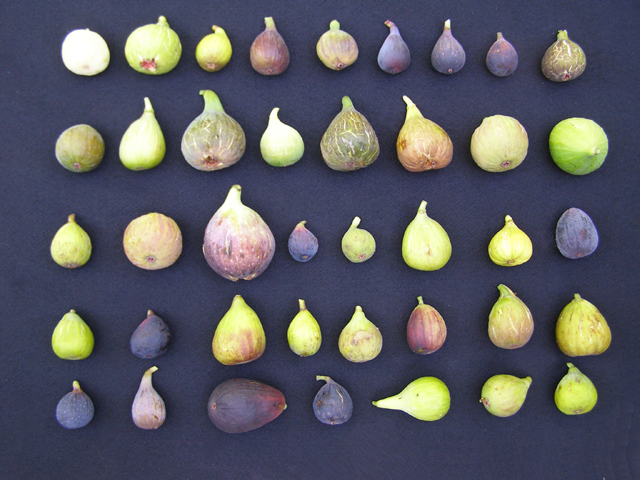
Available varieties
Figs are thought to have originated somewhere in the Middle East or Central Asia, and have been transported all over the Mediterranean region, most notably to Turkey, Italy, Greece, France and Spain. From there they made there way to the United States by many routes. Originally they were brought by conquistadors, missionaries and the early settlers of the Americas.
More recently a wide variety arrived with waves of immigrants near the turn of the 20th century. This migration has given us a tremendous heritage and diversity of fig varieties from which to choose.
Breeding programs at the University of California (UC) at Riverside and Louisiana State University have also added to thatdiversity.

Many nurseries sell figs, but only a very limited number of varieties are available. Most commonly you will see such varieties as Black Mission, Brown Turkey, White Kadota and Desert King.

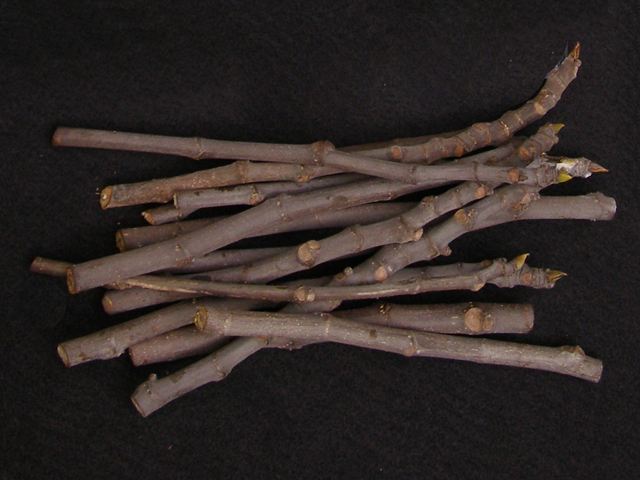
So the question we face is simple: how do we access the wide diversity of figs in existence when so few are commercially propagated? The simple answer is to buy them from me (grin). However, you can propagate your own trees by growing them from scionwood, which is available from a variety of sources. So, access to a wide variety of fig varieties requires understanding how to successfully propagate figs from cuttings.
Scions are available from the USDA collection at UC Davis, international collections and germplasm repositories,...
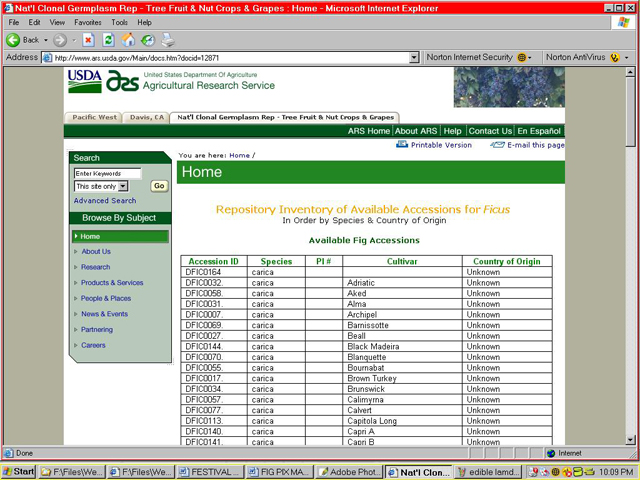
...through www.seedsaver.org, crfg scion exchanges, collectors across the country who meet in places such as the Figs 4 Fun Forum and from nurseries around the world.

4
Propagating.
There are many ways to propagate figs. They may be air-layered, grown from rooted cuttings, grown from suckers or sprouted from seed. Air-layering requires access to a tree for a long period of time, and the variety you want can often be in a different part of the country or the globe; suckers are not always handy when you want them; and seeds do not produce trees that are true to type, plus they are often sterile or functionally male caprifigs.
That leaves propagation from cuttings as the most practical method. Cuttings can be rooted in water, in potting soil, directly in the ground, in a variety of rooting media (such as sand, vermiculite or perlite) or in a bag.
5
Principles of rooting.
I am going to walk you through the method I use to root my cuttings, which will demonstrate one of many possible approaches to rooting, and illustrate the principles which are important. I’ve tried many techniques, all of which resulted in some success, but two things greatly improved my success: pre-rooting in a bag, and transplanting to a clear plastic cup containing specific media.
The most important element of successful rooting is illustrated by the story of Goldilocks. She was looking for porridge that was not too hot and not too cold, but “just right.” Similarly, rooting cuttings is about getting the moisture level not too wet, and not too dry, but “just right.” If you learn nothing else here, and end up remembering only this one point, you will have gotten your money’s worth: controlling moisture is everything.
Rooting success is almost entirely dependent on controlling moisture, both in the potting media and in the atmosphere around your cuttings. Soil moisture and humidity are crucial. The cuttings will rot if their soil is too wet. If it is too dry, the new roots will desiccate and die. If the humidity is too high, mold is a likely outcome, and if it is too low, the cuttings are at risk of desiccation before rooting occurs. Using a rooting media that maintains proper levels of air and moisture increases success greatly.
NOTE: Do not use rooting hormone, especially powdered hormone. The experience of many people indicates that it actually promotes the rotting of the cutting.
I am going to walk you through the method I use to root my cuttings, which will demonstrate one of many possible approaches to rooting, and illustrate the principles which are important. I’ve tried many techniques, all of which resulted in some success, but two things greatly improved my success: pre-rooting in a bag, and transplanting to a clear plastic cup containing specific media.

Humidity can be controlled in a greenhouse, or using something simple like a plastic storage box with the lid substantially closed.

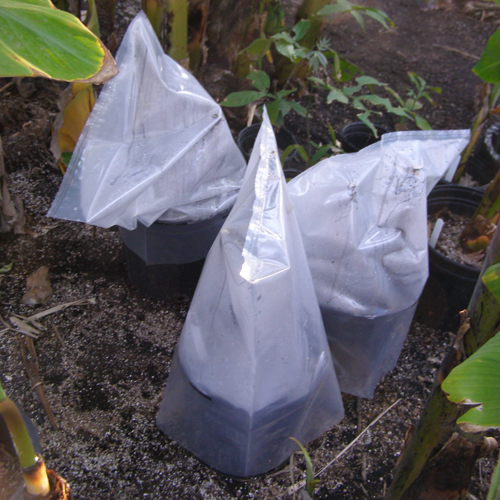
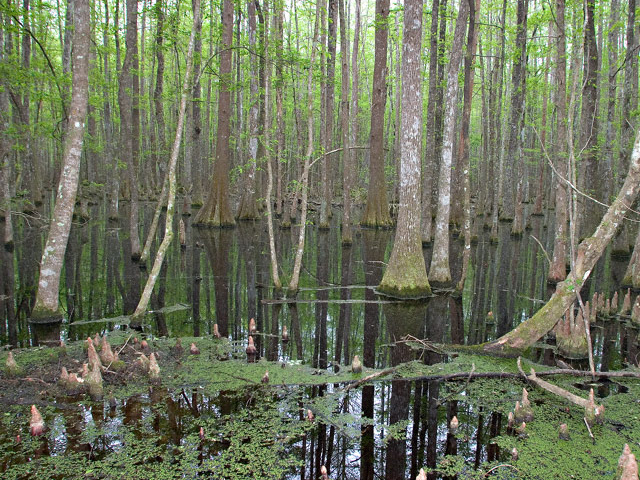
In the dry climate of San Diego, humidity in your cuttings’ rooting environment must be provided artificially. In the muggy Southeast, however, cuttings can be placed outdoors with little risk.
The other factor is heat. Rooting is greatly speeded up when temps are 70F or higher. Providing a warm environment can be as simple as placing your cuttings in a bag on top of the refrigerator, or a shelf above the stove. Last winter I helped a friend root cuttings from her neighbor’s tree using the bag method. She had never grown a fig tree before. Now she grows new trees for Christmas presents.

I learned “rooting-in-a-bag” from crfg member Richard Watts. I am sure that I don’t do it quite the way he does, because he puts his cuttings in his van, in his driveway, which provides solar heating to obtain warm temps for rooting. I don’t own a van, so I can’t follow his technique “step-by-step.” The point is not the exact technique, however, it is satisfying the principles involved: controlling moisture in the scion and providing proper temperature to stimulate root growth.
For me, the procedure is simple:
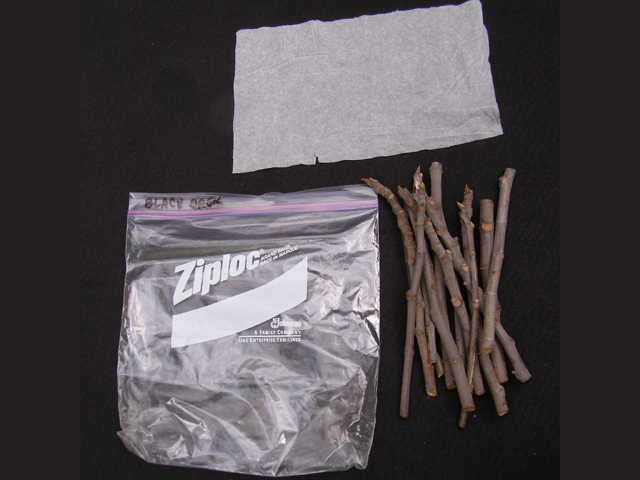
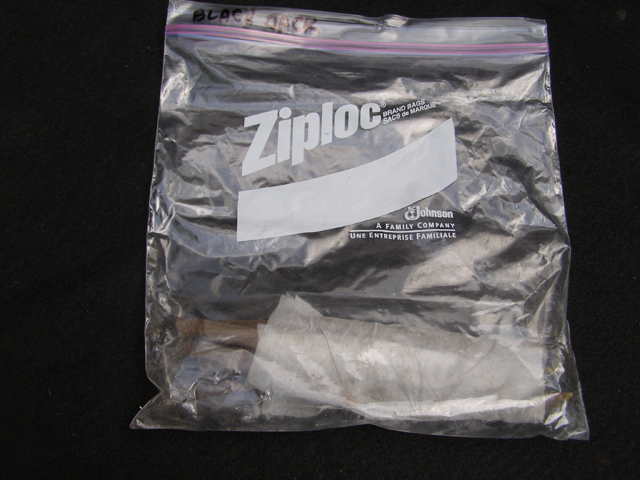
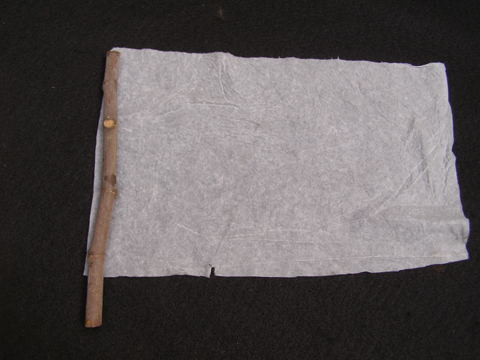
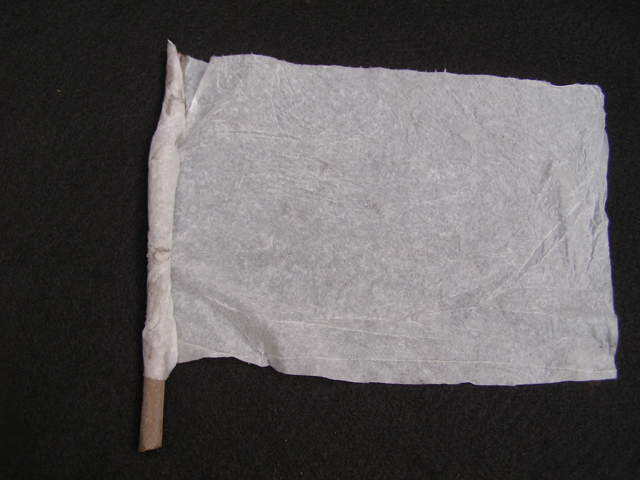
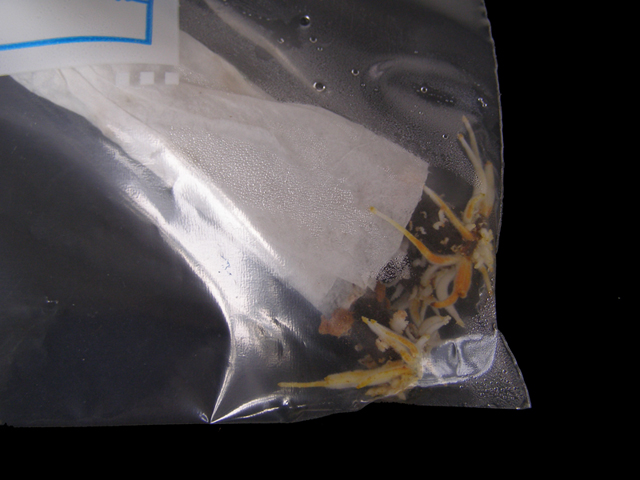
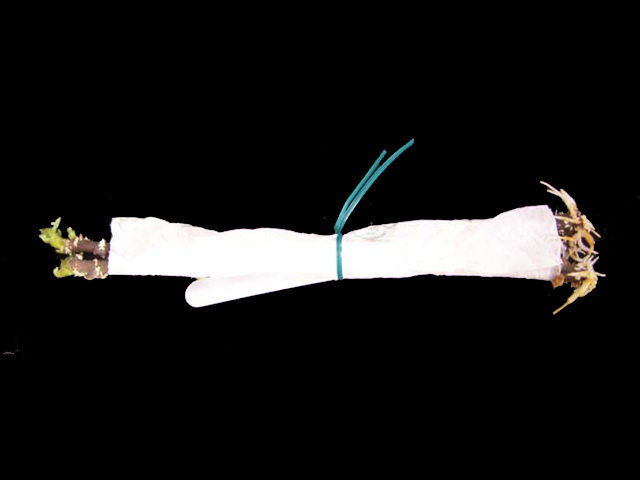
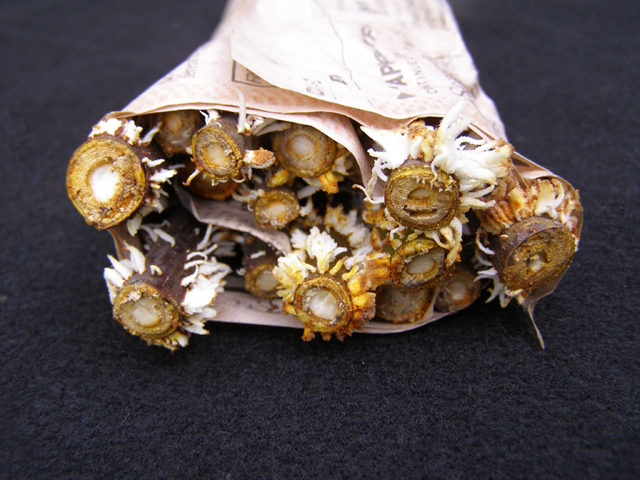
I wrap scions in lightly dampened paper towels or newspaper—the essential here is maintaining moisture, not a particular paper type—then I place them in a sealed plastic bag and put them in a warm place.
Sometimes I put them on my desk, were I can watch them. Usually I put them somewhere upstairs because heat rises.
Be patient; each variety is different and each cutting, even when from the same tree, can differ in its response.
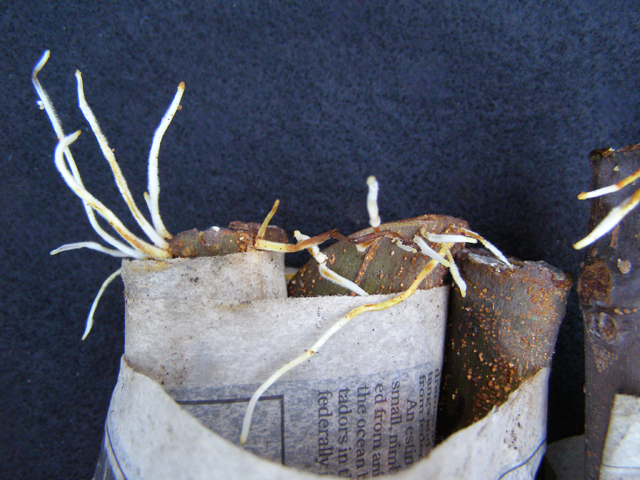
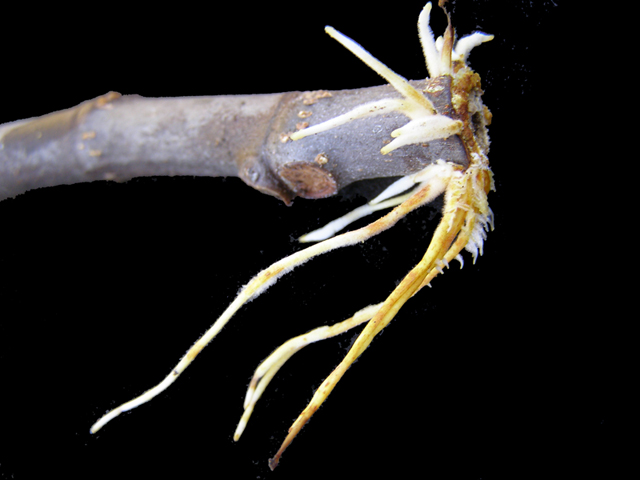
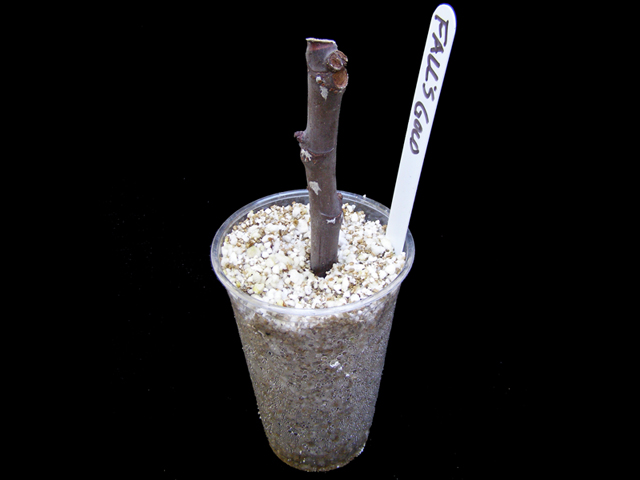
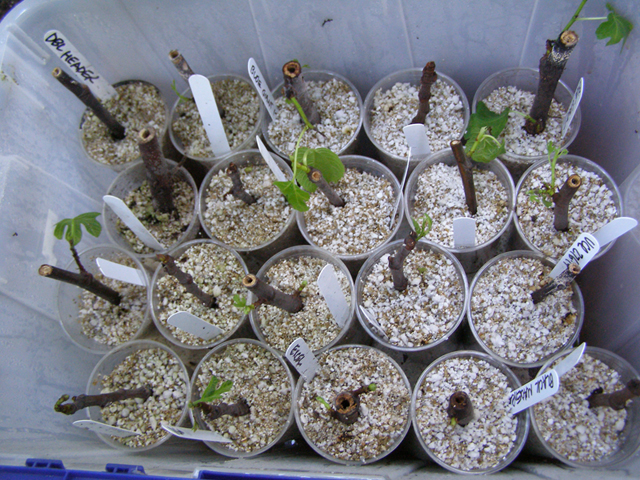
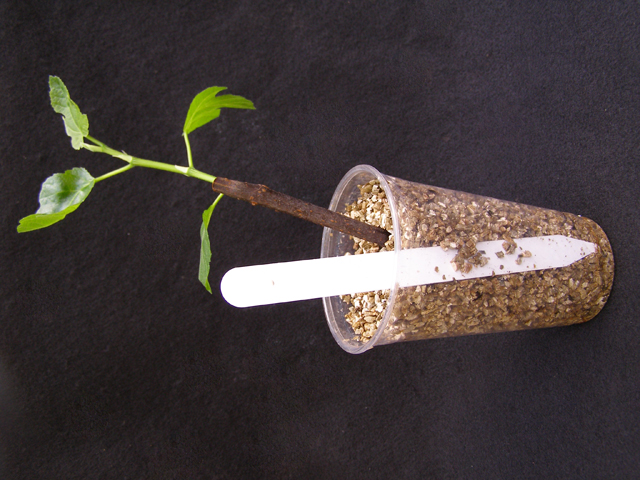
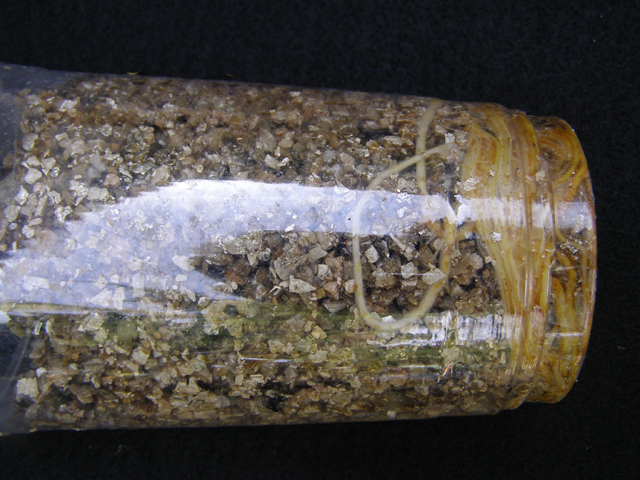
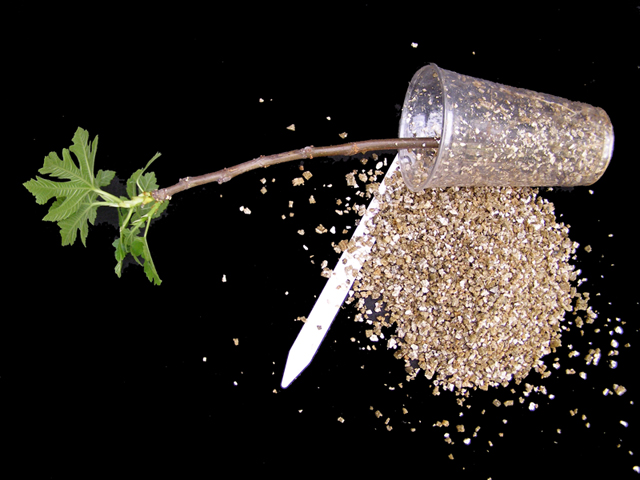
Once I see roots I transfer the scions from bags to 40-oz. clear plastic cups containing a rooting medium and with holes drilled in their bottoms—and remember that deeper cups are better. In a few weeks, you will see root initials begin to form, and then roots.
I have used a variety of rooting media. Potting soils hold too much moisture. Coarse vermiculite produces very good results. The coarse texture allows for good air penetration in the media, while the vermiculite holds the moisture well. When I couldn’t get the coarse vermiculite anymore, I switched to a mix of 60% perlite and 40% finer vermiculite. This medium also works well.
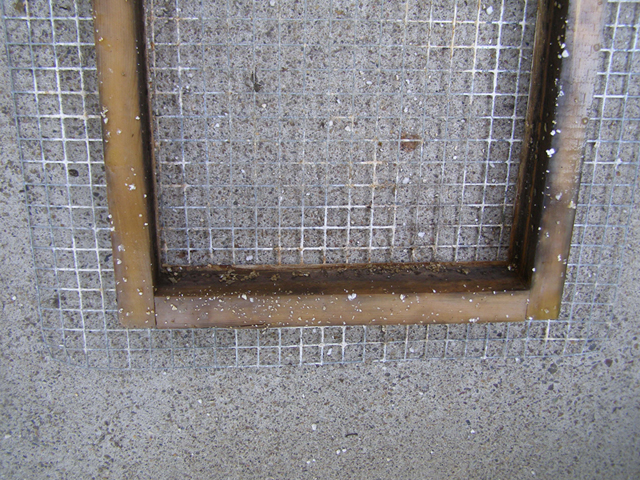
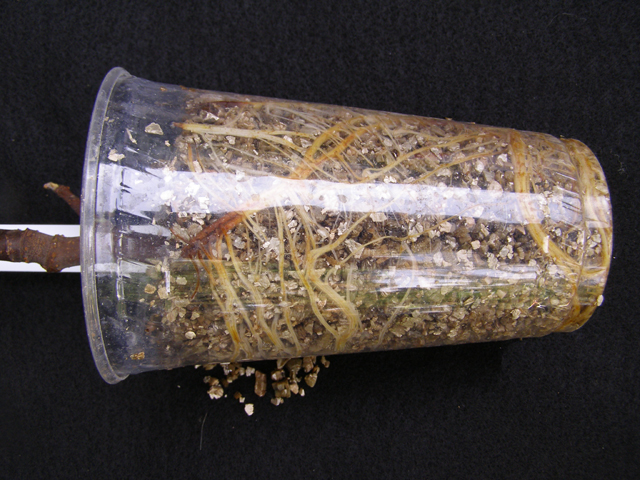
My cups are placed in plastic storage boxes...
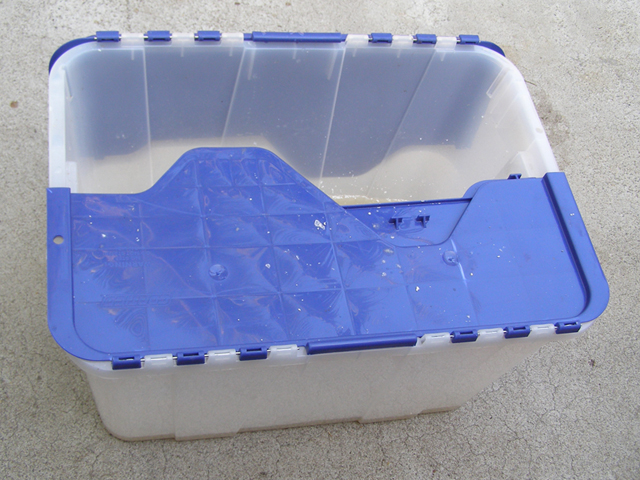
...on wire racks that I made.
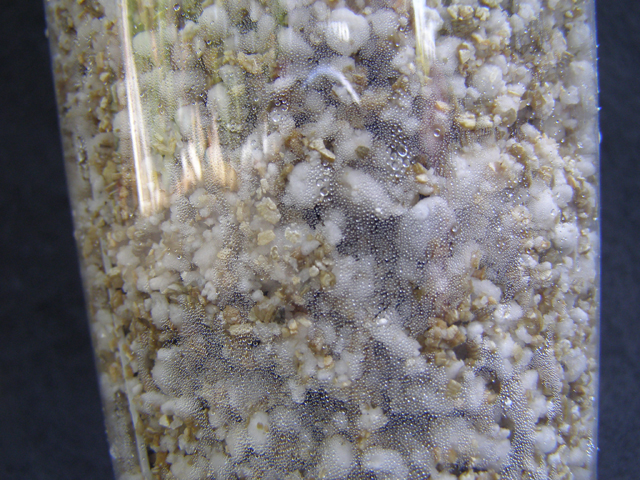
I have found that condensation on the inside of the cup is a good indication of sufficient moisture. The cups must not stand in water, however, or they will wick up the water and your cuttings will be too wet and will rot.
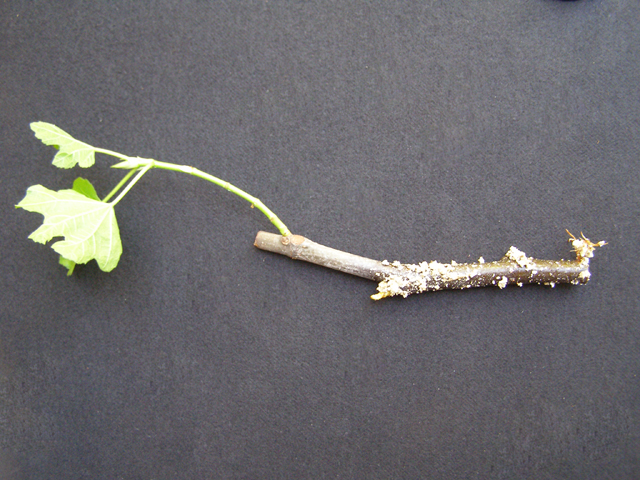
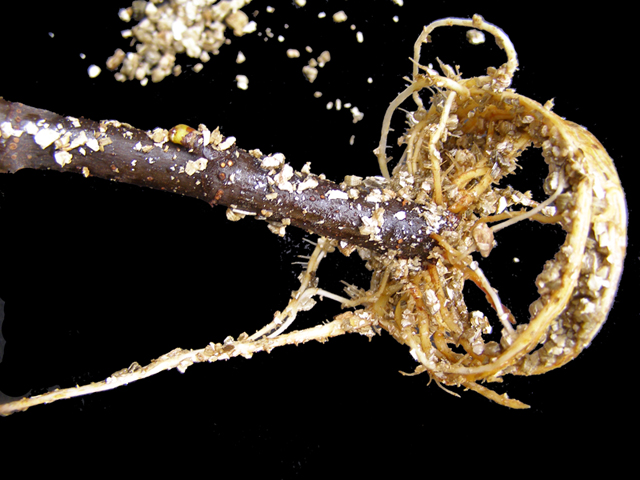
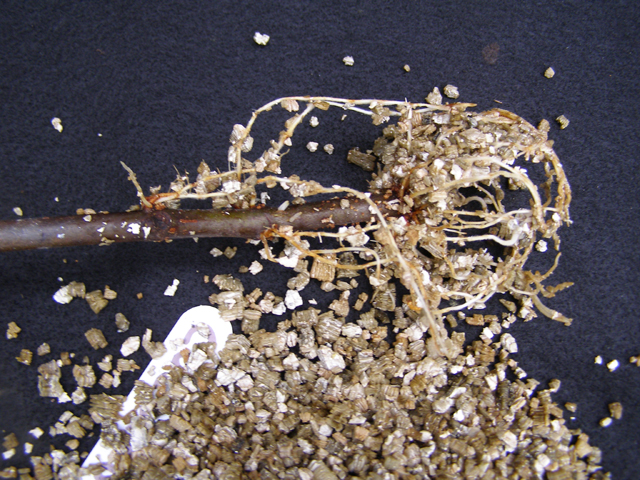
The second important principle to remember is this: roots and leaves have no relationship to each other. If you take a dozen cuttings from the same tree and grow them in the same rooting media in the same pot—as close to identical nature and nurture as you can get—some cuttings will grow roots...
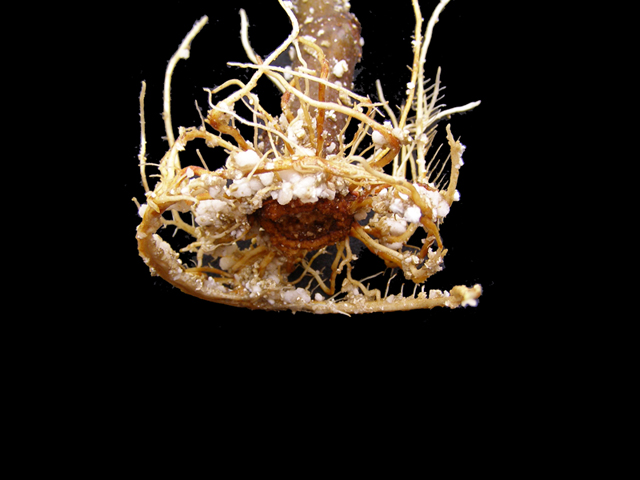

...and some will grow leaves, and some will grow both. You cannot presume root development from observing leaf development. This is why I use clear cups; they allow me to actually see whether roots are developing.
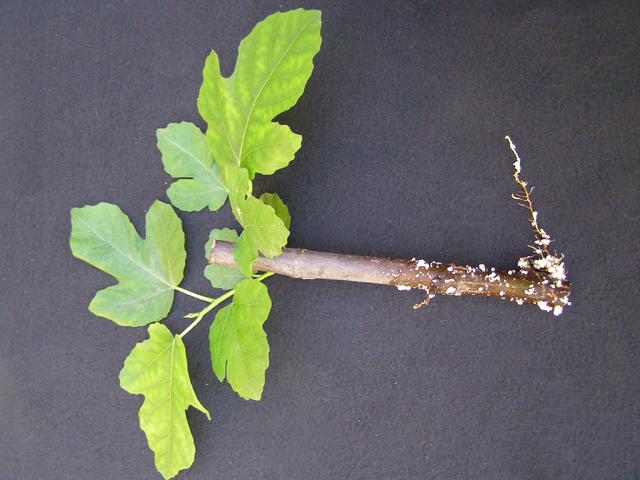
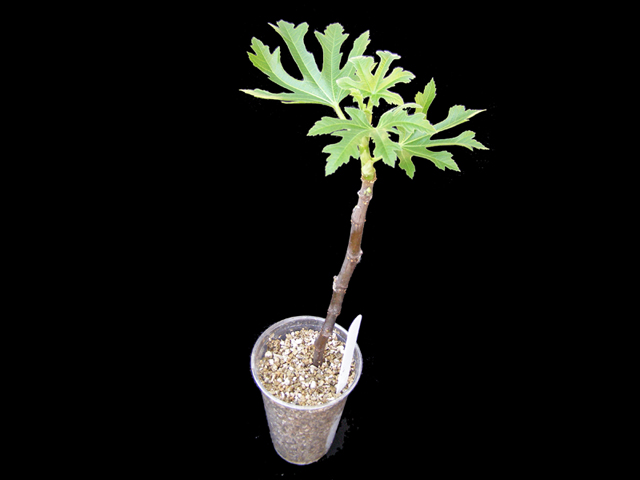
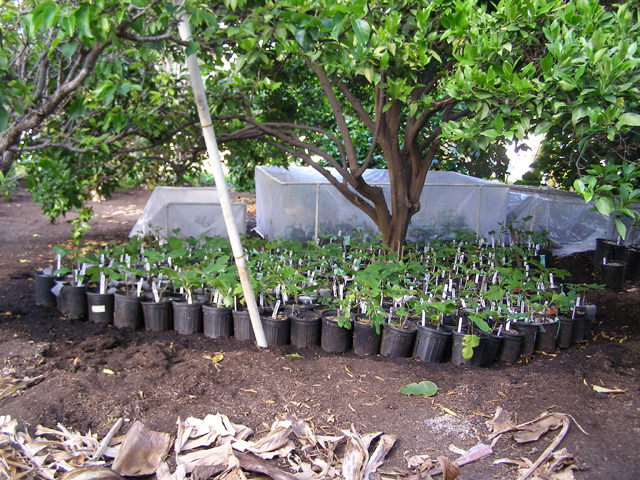
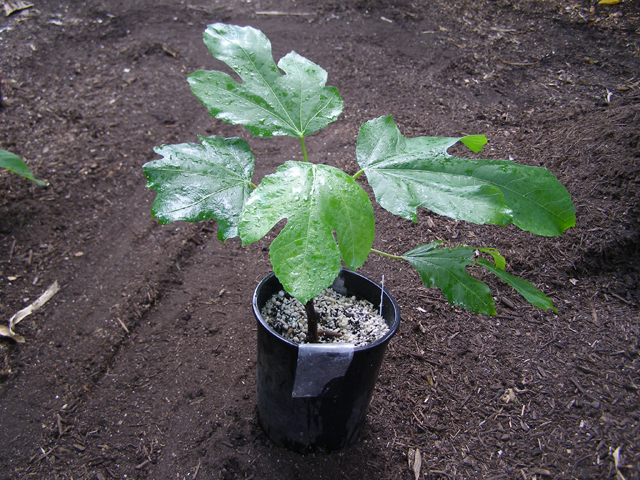
When I see good root development, I transfer the cuttings to 1-gallon pots containing a potting mix of 60% perlite and 40% compost, and acclimate them to the outdoors, usually putting them in shade with augmented humidity for a few days, and gradually introducing them to more sunlight over a period of weeks. At this stage, potting mix moisture control is still critical. Too much moisture will still cause rot and failure.
After the plants are successfully transitioned and evidencing new growth, I water appropriately. Once a week after I water them, I let them stand for an hour and then I re-water them with a half-strength solution of Miracle-Gro. In many instances, this will produce a 6-foot tree by the beginning of autumn.

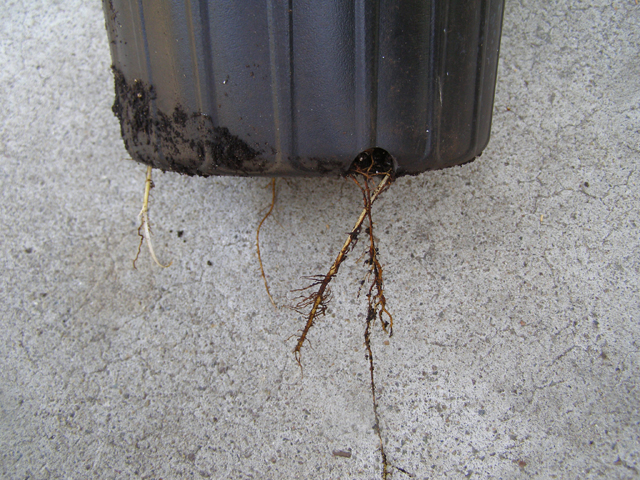
When I see roots in the drain holes, I transfer the trees to 2-gallon pots while reversing my mix to 40% perlite and 60% compost. When repotting again becomes necessary, I transfer the trees to 5-gallon pots, using 100% compost. Once they begin to outgrow the 5-gallon pots, they are large enough for planting in the ground, and will no longer require constant care—although they will need more frequent watering than an established tree.
6
Issues and problems.
I will leave you to research appropriate figs for your climate, but I will give you some broad guidelines to help you.
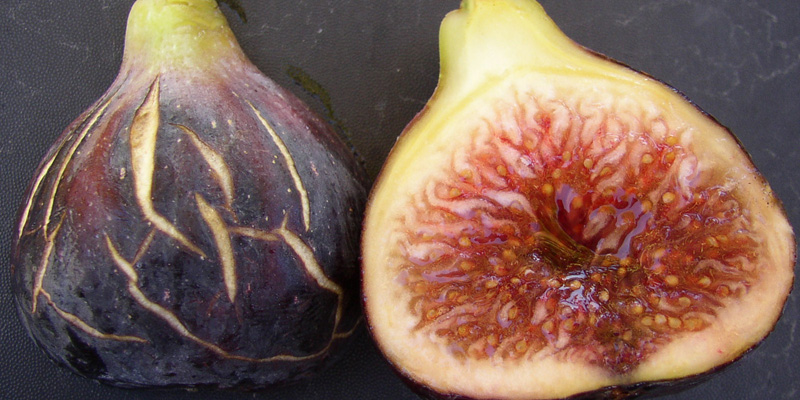
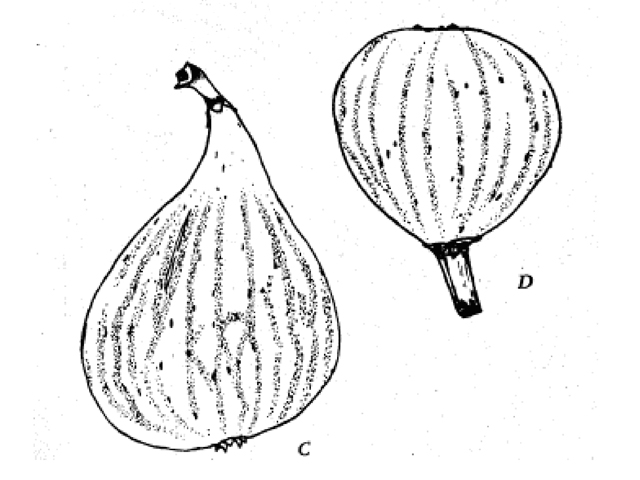
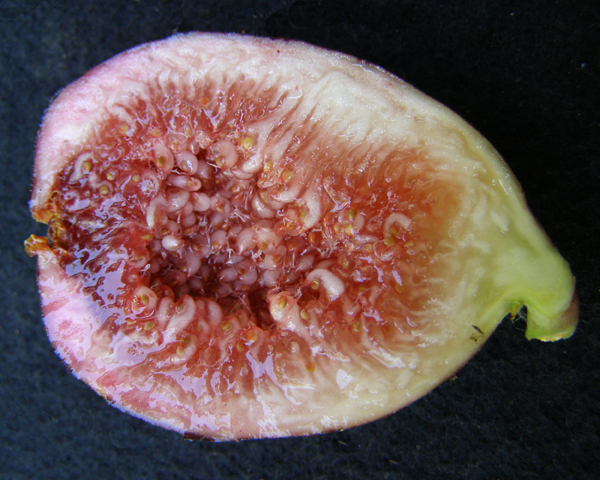
The eye is the opening at the end of the fig opposite the stem. Some are open, some less open than others and some are closed. Closed-eye figs are crucial in humid climates to prevent spoilage. A closed eye is also good for keeping out ants and other insects.
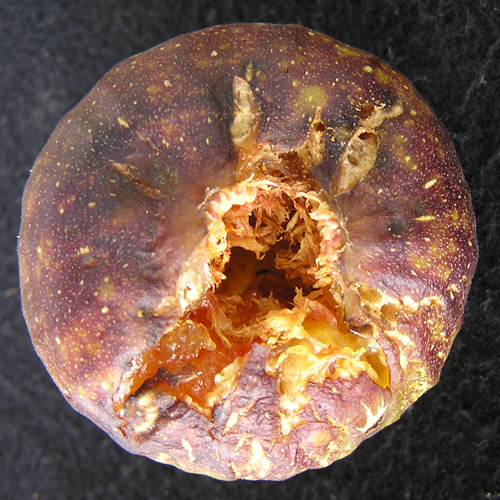
If a variety ripens very quickly—one such as Brunswick, for example—the openness of the eye is not so much a problem. Slow-ripening figs, such as White or Osborn are vulnerable over a longer period.
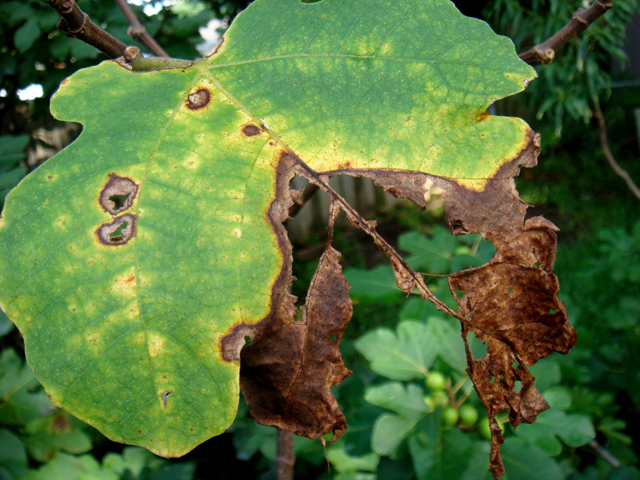
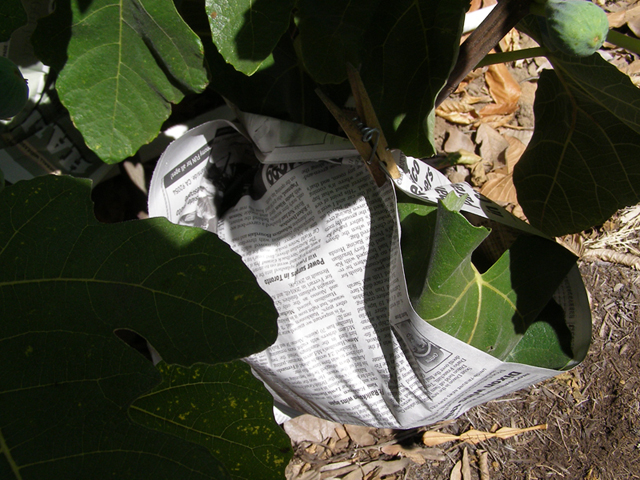
Rust is a disease problem usually associated with the humid Southeast; it affects the leaves and can lead to defoliation of a tree. This is not reported as a problem in California and the Southwest. Other common pests include ants, beetles (Mexican fruit beetle in San Diego), squirrels, rats, opossums, deer, dogs and birds. around them using clothespins, moving the protective cover as you harvest your fruit (photo below).
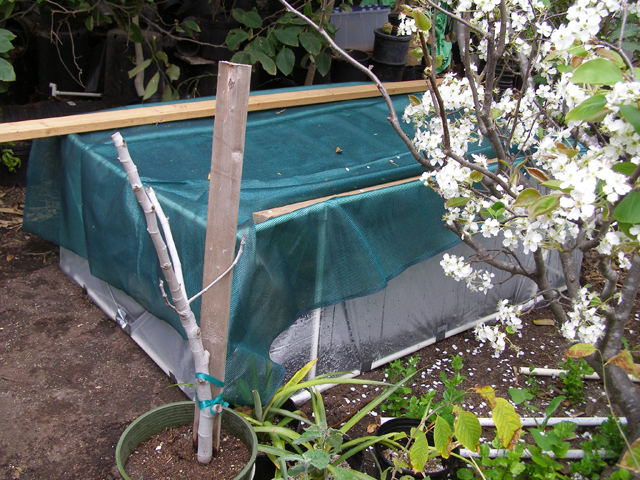
The most effective bird deterrents are nets...
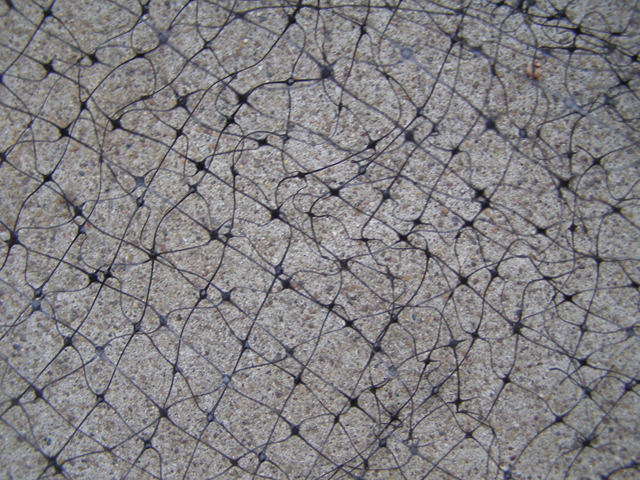
... or newspaper—another technique I learned from Richard Watts: protecting near-ripe figs by fastening old newspaper...
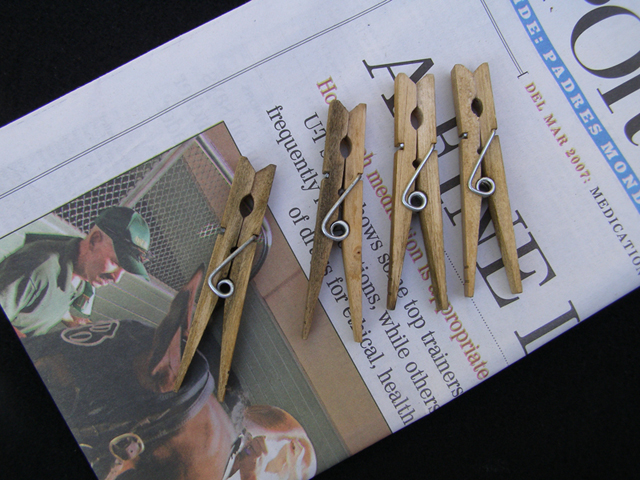
...around them using clothespins, moving the protective cover as you harvest your fruit.
Humidity and length of growing season are crucial factors in selecting a variety. Hot, dry, long seasons are always good, considering from where most of the figs originated: the hot, dry areas of Asia. More heat and more sunshine are always good for ripening figs (probably even in desert Arizona, but I do not have experience there). Shorter, colder seasons, such as the Pacific Northwest, limit the range of varieties that can be successful, and people living in such climes often place a premium on varieties that produce good breba crops.
Did you really want to see a picture of a moldy fig?
Splitting occurs in some varieties, which usually ruins the fruit. In my orchard the guilty varieties are Panachée, Black Madeira, Conadria, Rattlesnake Island, and some Brown Turkey or Brown-Turkey-like figs. The popular theory is that overwatering during ripening is the culprit. However, I like to think that I am pretty consistent in my cultural practices from year to year and tree to tree, yet some years and some trees produce fruit that is far more prone to splitting. My Vista Mission has never, ever had a split fig, but when grown in New Jersey, it definitely had a problem.

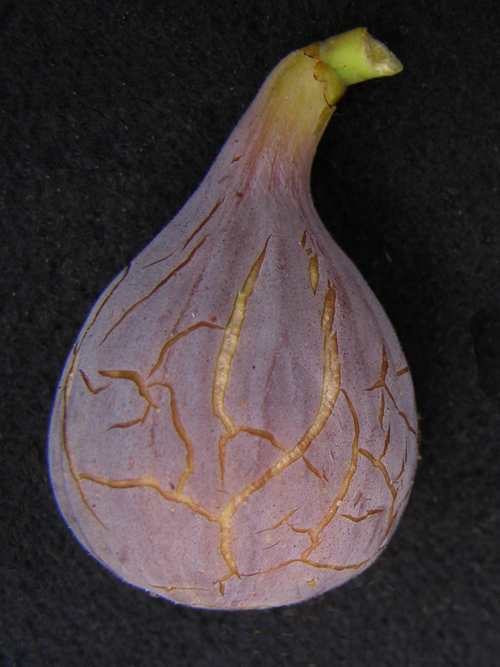
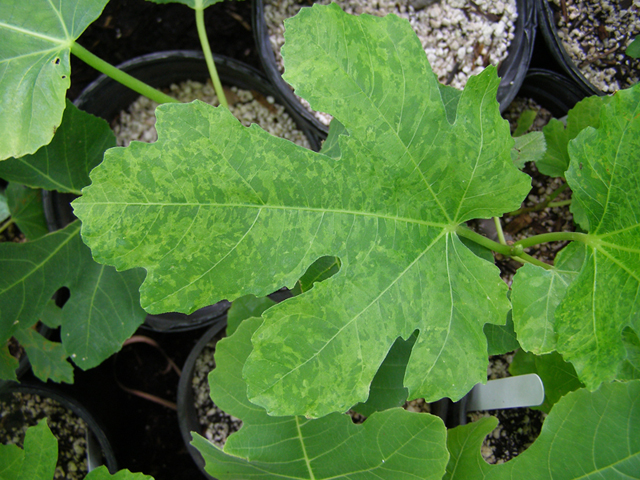
FMV, or fig mosaic virus, while widely debated, will be a fact of life if you collect many varieties. Plants from venerable nurseries such as Belleclare on Long Island, New York, were infected as well as locally grown trees sold at Home Depot. USDA/UC Davis trees are all infected, or potentially so. The bottom line is this: the virus manifests itself in misshapen leaves...
...and splotchy colored leaves, perhaps stunts growth in some varieties and perhaps results in lesser fruit production. Black Ischia is the poster child for stunted growth, but I know of no certifiably uninfected tree that can be used for a growth comparison test. It may be that Black Ischia is just a variety which lacks vigor, anyway. Rattlesnake Island seems to have similar poor growth, but again, there is no verified uninfected tree that I know of to use as a “standard.”
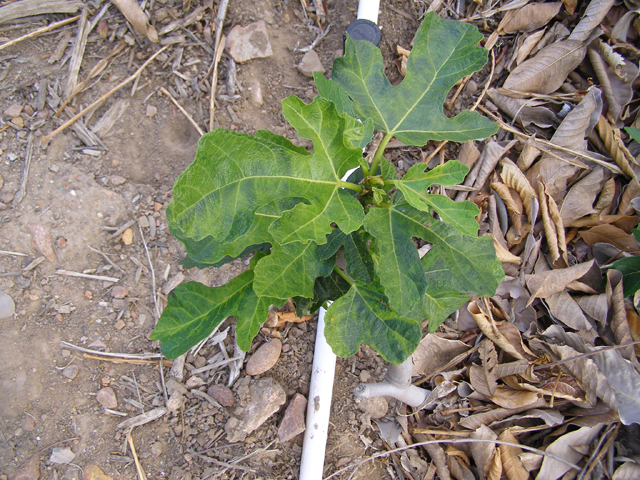
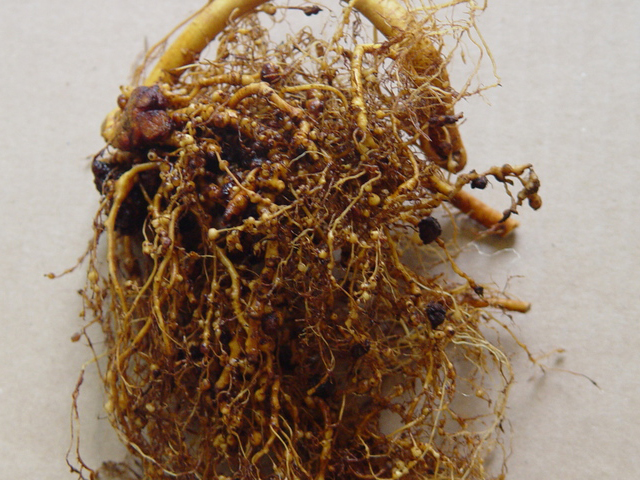
Root-knot nematode (Meloidogyne sp.) affects the roots of the tree and can stunt growth, sometimes severely.
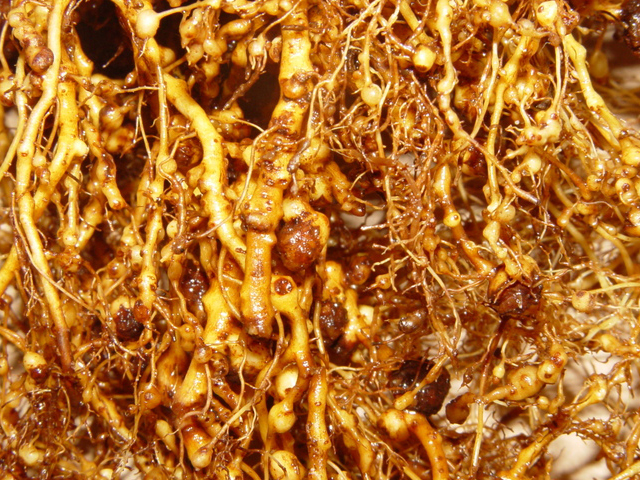
There is extensive literature about it on the Internet.
7
Ripening and Harvest.
Many signs indicate that a fig is ripening. Getting to know your variety is critical, because each variety has different characteristics and, more important, progresses through the ripening process at a different rate. Dark Portuguese will need at least seven days after showing a color change, but Brunswick completes the process in about 36 hours. Generally, most of the flavor and sugars are developed in the last day or two of ripening, so just picking a day early can have a significantly negative impact on the enjoyability of the fruit.

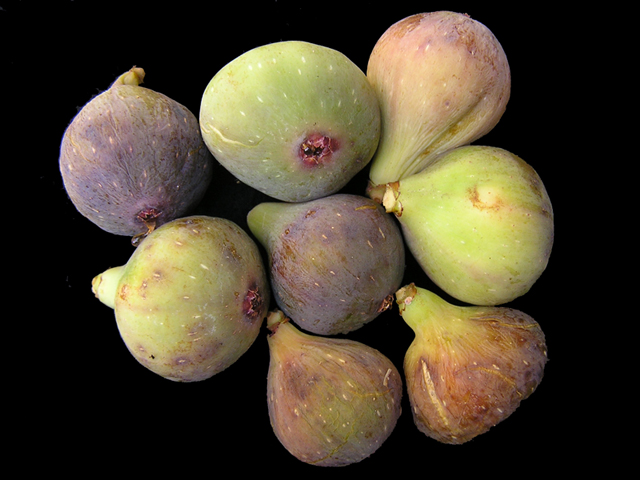
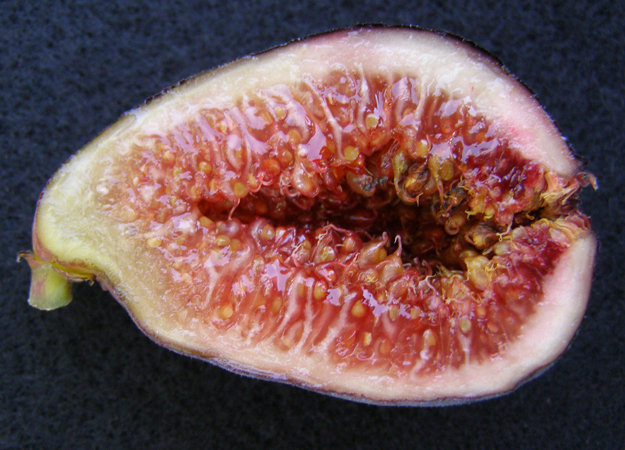
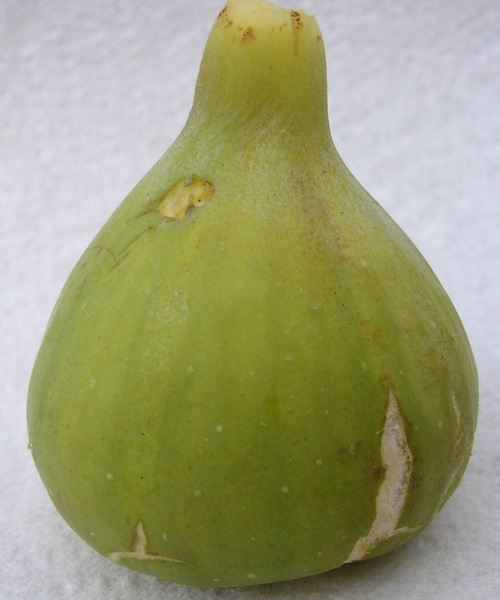
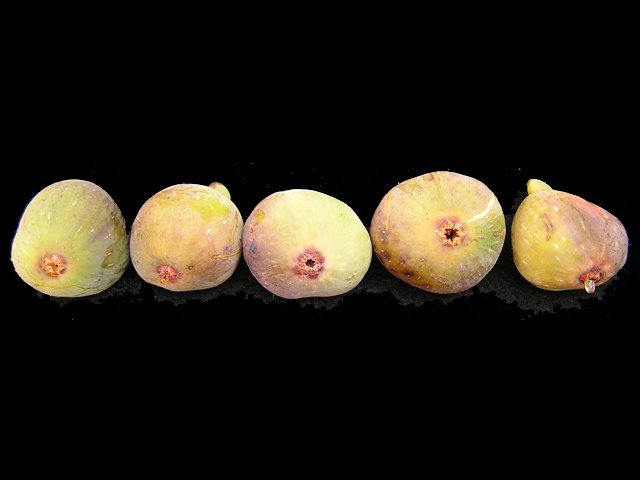
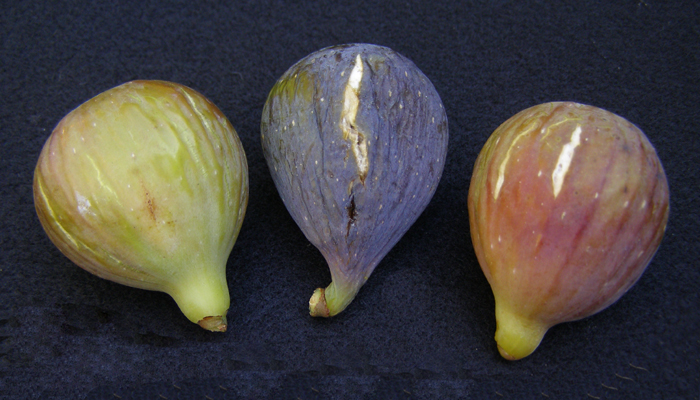
Figs exhibit a significant size increase when they begin to ripen.
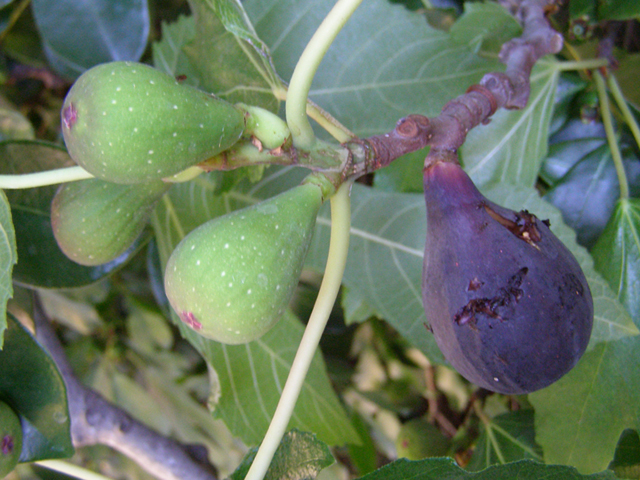
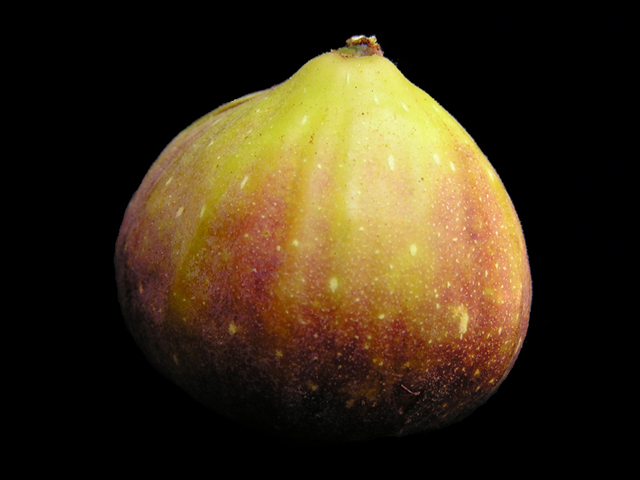
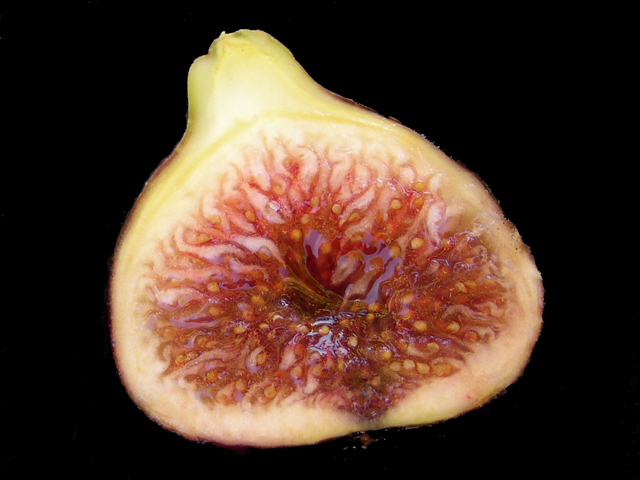
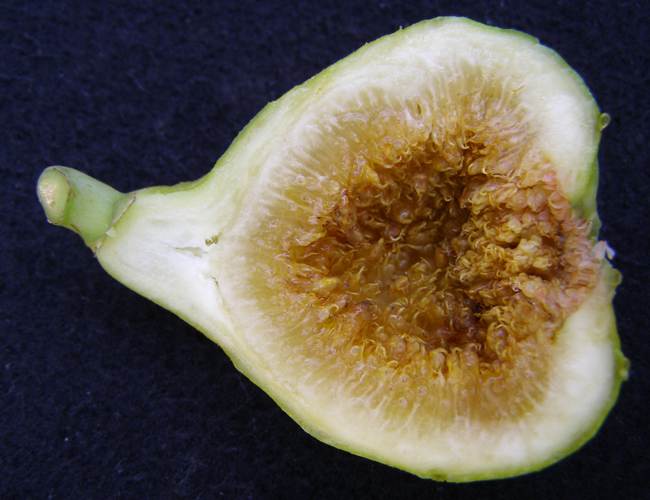
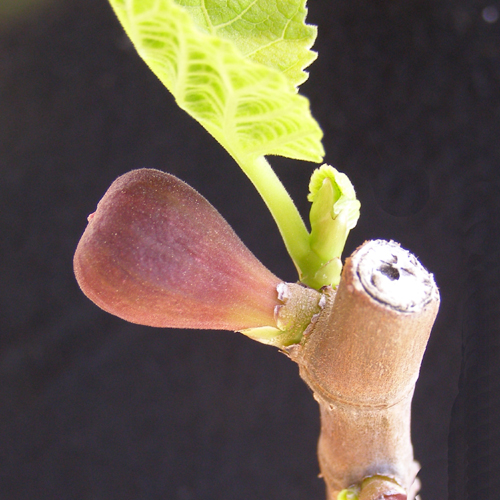
This usually happens concurrently with a marked color change. The color change is most noticeable in dark colored figs...
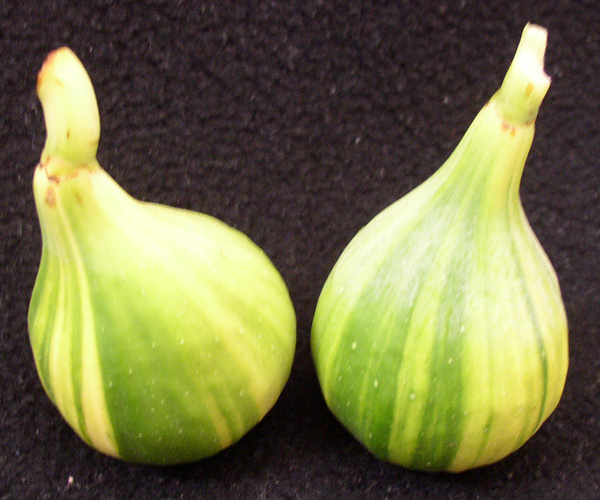
...and least noticeable in figs, such as the Whites, which only exhibit a change to a lighter shade of green or turn a yellowish green.
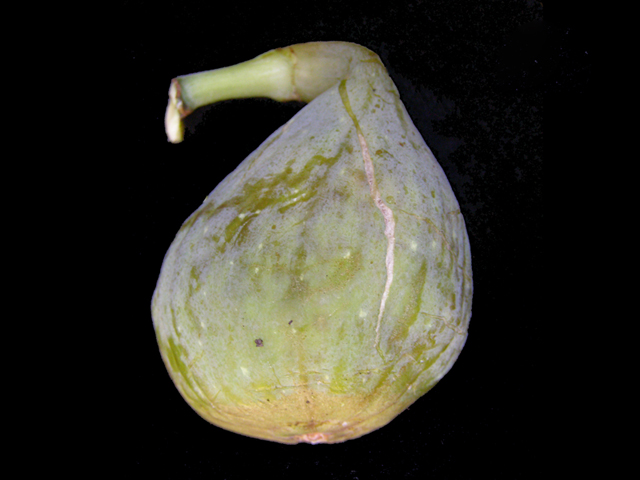
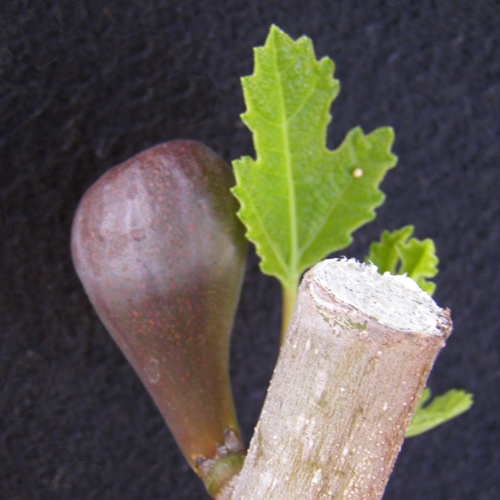
As a fig ripens and increases in size and weight, it will usually soften, which will cause it to droop or sag.
The skin of some figs will split as they increase in size. This is perhaps the most notable attribute of the Black Mission fig.

Some varieties will almost dehydrate on the tree, especially in hotter, dryer climates and will look visibly shriveled... and wrinkly when they are ready to eat. Celeste and Vista are two good examples.
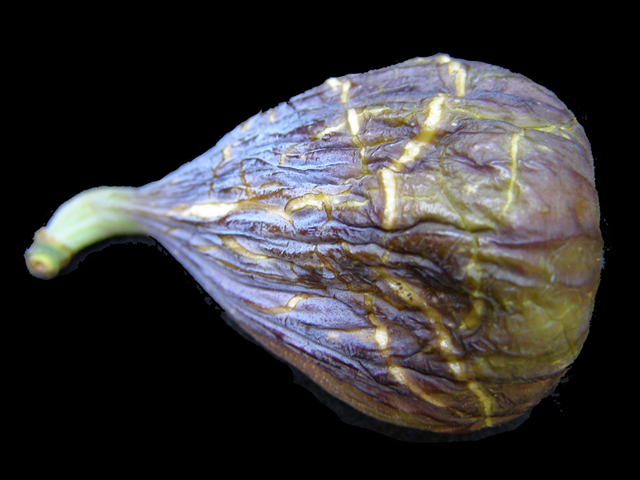
Some varieties when ripe will exude a drop of honey-like nectar from the eye.
NOTE: a cool period during ripening will delay ripening, and in some varieties, interrupt their maturation process, so that they will "ripen", but they will not develop the full sugars and flavors that they would have had if they ripened in warm weather.
8
As we come to the subject of pruning, we need to make a short digression into the arcane world of botany.
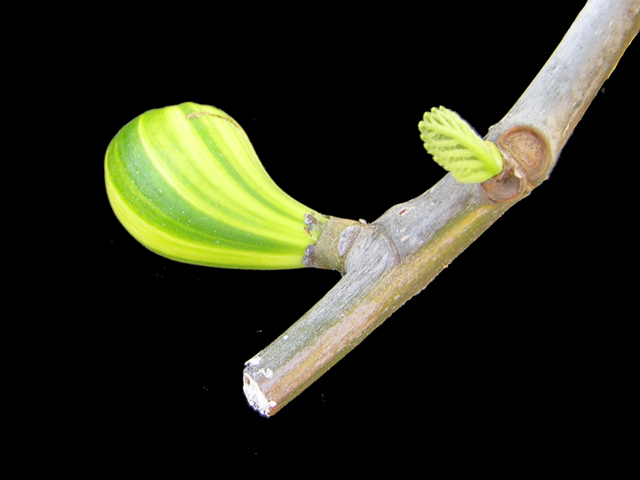
Breba figs form on wood that grew last season and has been dormant through the winter.
Main crop figs form on the new growth that appears this season. Some varieties produce only a breba crop; some have both breba and main-crop figs, and many have only main-crop figs. If you prune a breba-only variety, you reduce or eliminate your fruit for that year. If you prune a variety with breba and main-crop figs, you sacrifice the breba crop. If you prune a main-crop-only variety, you lose nothing. In my opinion, breba-crop figs are not numerous, and mostly of inferior taste, sweetness and quality.
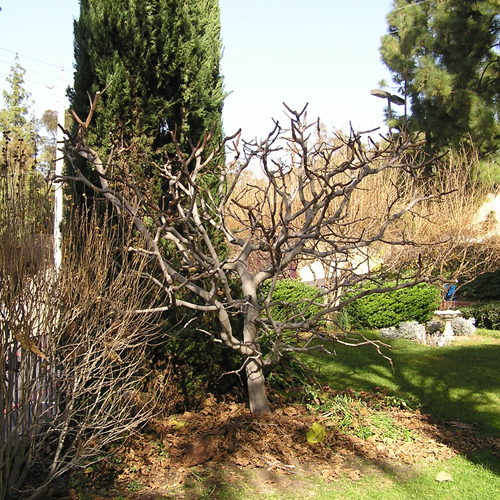
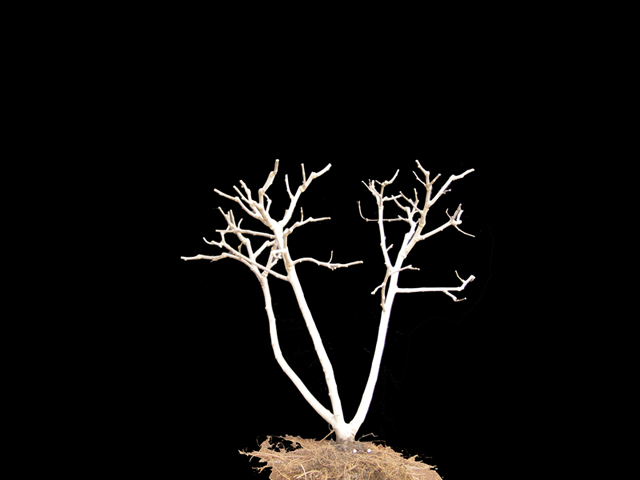
Growth habits and Pruning.
These factors are important in deciding how to prune your tree. Since I am willing to sacrifice the breba-crop figs, I can take a 10-foot-tall tree and prune it to 18 inches, and be quite happy with my main fig crop.
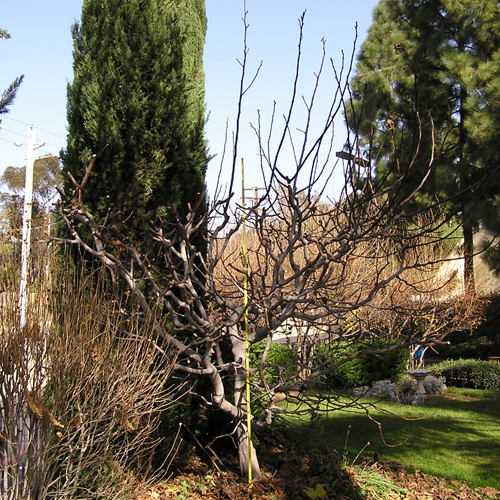
Since I planted my orchard on a hill, severe pruning of my trees into a more bush-like shape allows me to reach my fig crop without using a ladder.
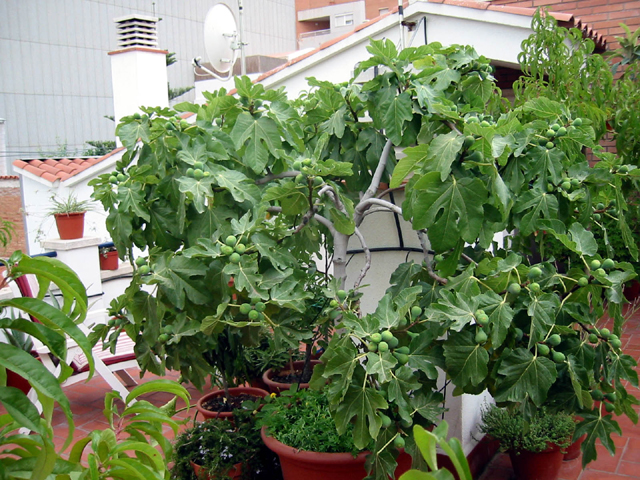
Figs can be grown in pots quite successfully. In fact, many figs in the east are grown in pots, so that they can be stored in sheds and garages for the winter, so that they are not damaged by freezing weather.
They can be winterized by wrapping them in carpets and tarp...
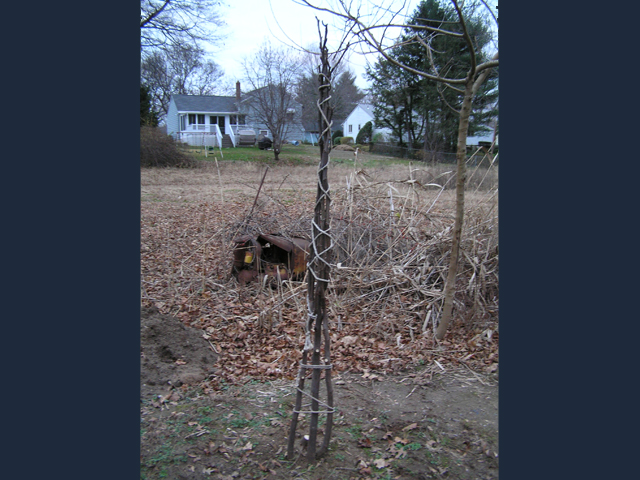
...burying them under piles of leaves...
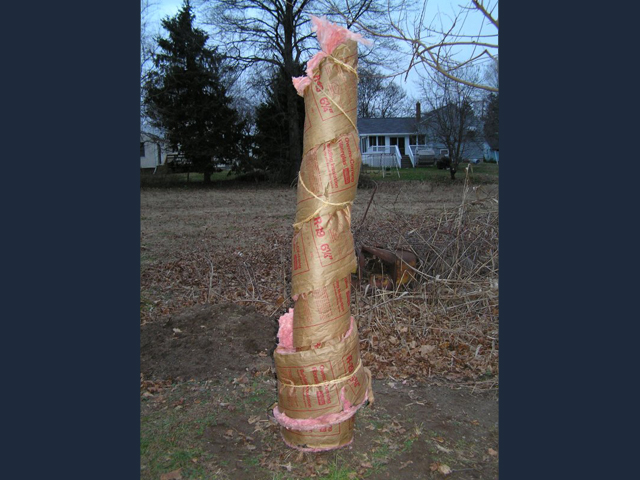
...and even burying them in the ground.
Generally, we Californians do not need to go to these extremes.
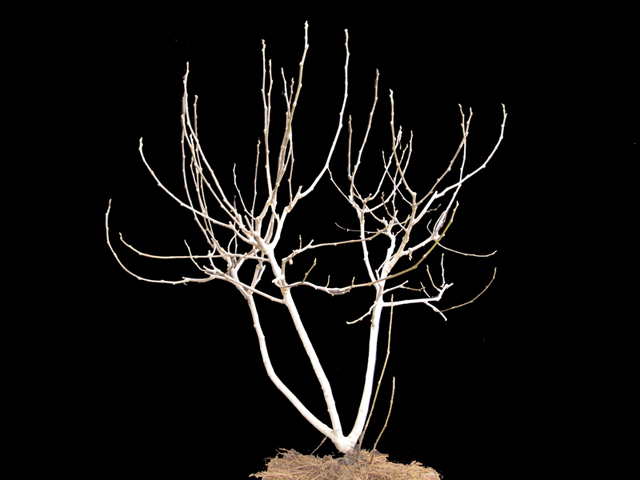
There are dwarf varieties, or perhaps more accurately, some less-vigorous varieties that seldom require pruning. However, with most varieties size control must usually be accomplished by pruning.
Varieties such as Black Mission and Panachée can grow more than 10 feet in a single year.
Identifying an unknown variety is usually difficult, and often impossible. The only vivid memory of a seminar on figs by Richard Watts many years ago was this statement, paraphrased here: the size, shape, and color of a fig can be dramatically different depending on soil, climate, fertilization, watering and any other factor.
I have experienced this many times since. I purchased a Sultane fig tree from Paradise Nursery, in Virginia Beach, Virginia (the nursery closed its doors this spring but is still operating its website for a limited time, to offer fig-growing information). I sent a picture of it to nursery owner Sybil Mays to see if she would recognize it, and she did not recognize a fig variety which she had sold to me.
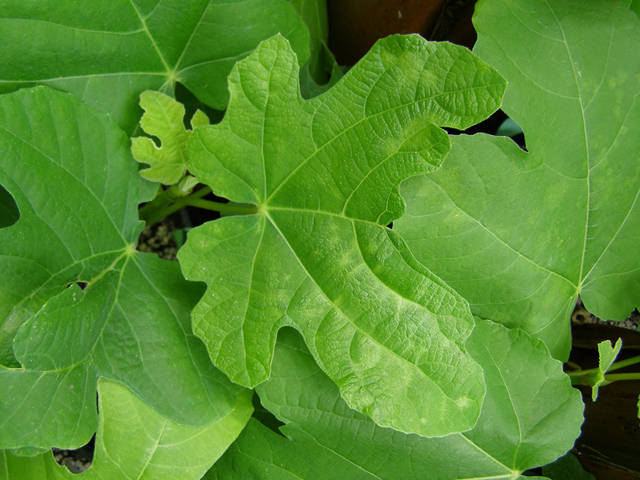
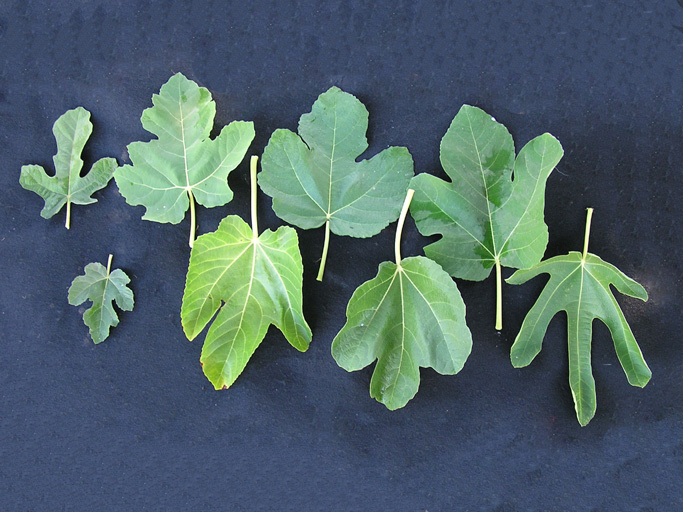
Often leaf shape is used to classify and identify fig varieties, but fig leaves are extremely variable, even from the same tree. Generally they can be used most effectively to rules out varieties, rather than to make a definitive identification.
9
Resources
USDA Agricultural Research Service


Adriano's Figs - Canadian Specialist
CRFG - California Rare Fruit Growers "Fruit Fact" about figs

The Fig by Ira Condit - Classic book about figs


CRFG - California Rare Fruit Growers Fig Specialist

NURSERY LIST
Bay Laurel
Belleclare - closed 2007
Burnt Ridge
Clifton's
Cloud Mountain
Dave Wilson
Dinter
Ebay
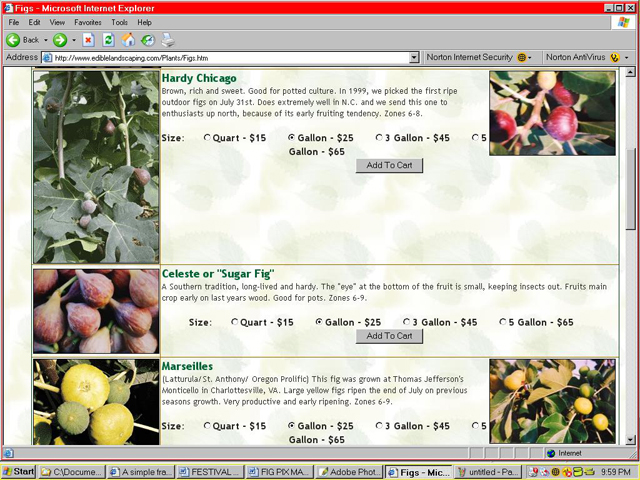
Edible Landscaping
Encanto Farms Nursery +++
Fannick's
Grimo Nut
Hidden Springs
Italian Fig Trees
Johnson
Just Fruits and Exotics - no shipping to California
La Verne
One Green World
Paradise Nursery - closed 2007
Parks
Perry's
Raintree
Rolling River
Sanhedrin
Territorial Seed
TyTy - Avoid, period.
Wentowrth
Whitman
How to Root Fig Cuttings in a Bag
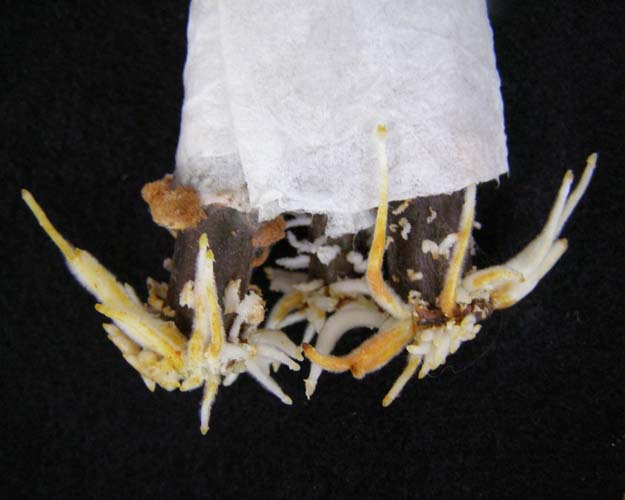
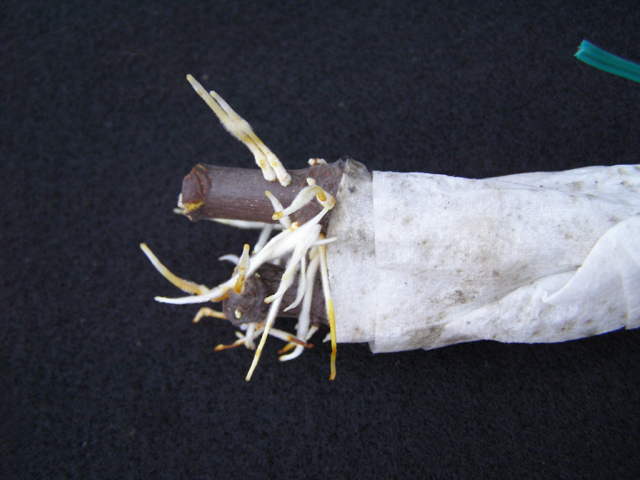
Take dormant cuttings approximately 8 inches long, and wrap in very slightly damp paper towel or newspaper, covering the entire cutting except the bottom half-inch. This allows the bottom end to “callus,” which helps to prevent rot when rooting. If you are doing several cuttings, roll the first one in the damp paper, then add one, and roll, and add, and roll, until you have five to six cuttings in a bundle. Place the bundle or bundles in a plastic bag. A Zip-loc or other zipper-type bag will work well. Place the bag in a warm place (but not in direct sun) with a temp of 70–80F. Check frequently for signs of mold, and if necessary air out the cuttings for a few hours. Re-moisten the paper if necessary; this is not usually needed if the bag is tightly sealed. Under the conditions of warmth and humidity, Roots will develop, starting as small white bumps called initials, and gradually elongating into recognizable roots. When there is good development of roots and/or initials, unwrap the cuttings carefully, and pot them up as follows.
Use clear plastic picnic glasses, of about 45-ounce capacity. Temporarily stack 3 or 4 cups together for firmness and drill 4 to 5 drain holes in their bottoms. Take one cup and place coarse, well-wetted vermiculite in bottom half, prepare a hole in your medium and carefully insert the cutting into it, then finish filling the cup with more of the same vermiculite. Place in a container (I use a plastic storage box), with a wire rack or other suitable arrangement that allows water to drain through the cup while keeping it from standing in water. Return the cuttings to your warm place. To maintain humidity, you may want to partly cover the container to simulate a greenhouse environment. Allow for some air circulation to avoid mold. Water only as necessary. The most important element is providing overall humidity, without keeping the root zone overly wet.
The coarseness of the vermiculite allows air in the root zone while holding moisture there. If the vermiculite is too fine or packed down too much, it excludes air and retains too much moisture in the root zone. Generally, if you have placed your container in a warm environment and you see condensation on the inside of the cup, there is sufficient moisture. If not, it is too dry.
The clear cup is important because it enables you to monitor root development. Leaf development is not an indicator of root development. Being able to see the roots is the best way to know what is happening.
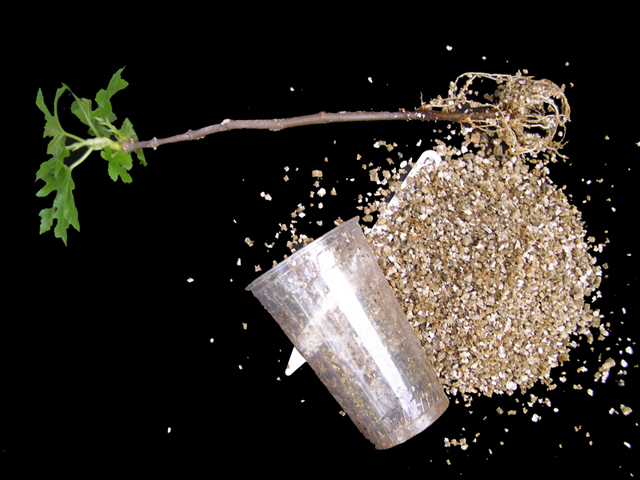
When there is good root development (do not rush this step or be in a hurry to repot in potting soil) repot in a 1-gallon pot using a minimum of 60% perlite in the mix, and the other 40% compost or similar organic component. The vermiculite will shake out of the cup when pointed down at about a 30-degree angle and rotated and squeezed, followed by the rooted cutting. After potting, place in well-filtered shade with good humidity until the plant is stable, then increase sunlight gradually. Water when needed. After about a month, water, and let the plant absorb the water for 1 hour, followed by a half-strength solution of Miracle-Gro. This keeps you from burning the plant with the fertilizer. Fertilize twice a month. When roots begin to grow out of the drain holes in the 1-gallon pot, repot in a 2-gallon container with 40% perlite and 60% compost. When roots begin to emerge from the drain holes in that pot, move to a 5-gallon size, using pure compost. When roots are visible in the drain holes of the 5-gallon pot, plant the tree in the ground. At this point, the plant is sufficiently developed to be stable and durable, but for a while will require a bit more watering than an established tree. Many cuttings will grow to 2 to 5 feet tall in their first year, but some varieties are slower growing.